

Storemapper offers a variety of features to help you customize your web map to perfectly fit your brand. Read on to learn all the different ways you can design a Storemapper map as unique as your business.
Table of Contents
- Matching your map to your brand in Storemapper
- Brand colors
- Marker icon customization
- Default starting location
- Filters
- Custom fields
- Custom CSS
Fully customize your brand maps with Storemapper
Start your free, no-risk, 7-day trial today
No credit card required
Matching your map to your brand in Storemapper
There are a number of customizations you can make on your Storemapper dashboard to showcase your particular brand. In the Storemapper settings, simply navigate to the Appearance tab. This is where you can customize the following:
1. Brand colors
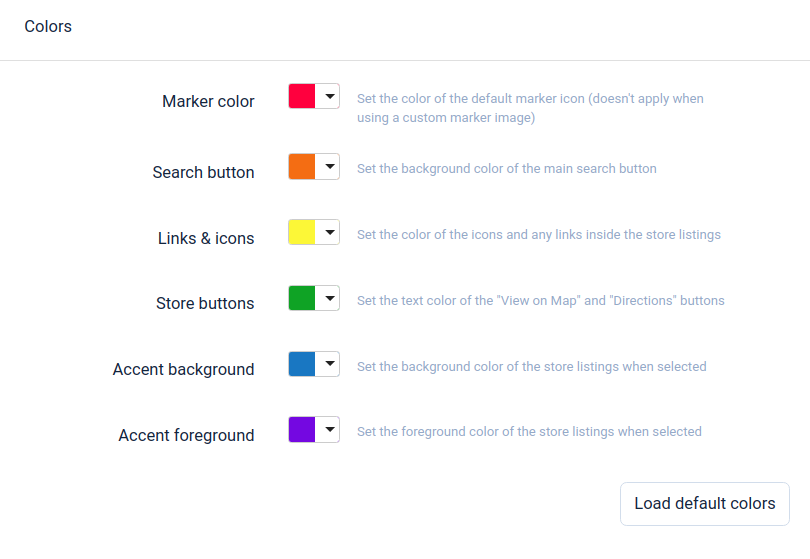
Under the Colors heading, you can customize your brand colors, choose a marker color, and set the color of buttons, map accents, icons, and links. For the full breakdown on how these colors look and affect your design, you can check out this helpful tutorial on customizing store widget colors.
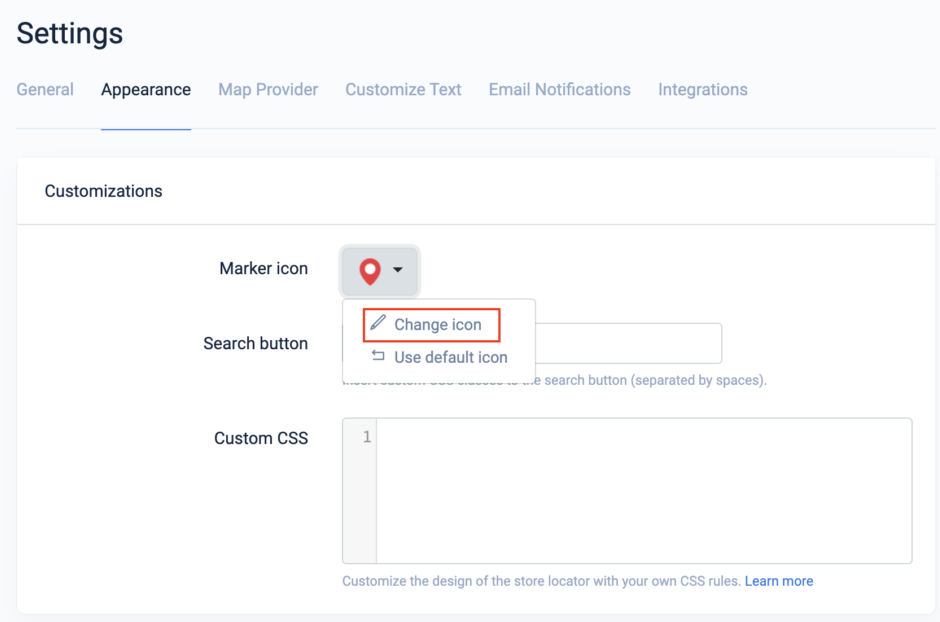
2. Marker icon customization
If you’d like to use your brand logo to change all pins to a custom marker instead of the default Storemapper pin, first, navigate to Settings > Appearance > Change Icon. Here are the steps to customizing your marker:
- Host the image on your site
You won’t be able to upload your custom file to Storemapper, so first, you’ll need to host the image on your own website. Once that’s done, copy the URL for the image. The typical marker size is about 30x30 px.
- Paste your hosted URL
Under Change Icon > Change Your Marker Icon, paste the URL and hit save.
You can also set custom markers specific to different stores. For instance, if you’d like to identify your flagship store or show which stores carry a particular product, Storemapper allows you to use multiple markers for additional customization. You can either upload these manually or in bulk. For further details and to see a few examples of custom markers others have made, you can check out this help article.
3. Default starting location
You can also choose exactly where your customers’ default map location will start. For instance, if the majority of your stores are located in the city of Boston, you can set your map’s starting location to Boston and specify the distance you want your map to show when it first loads.
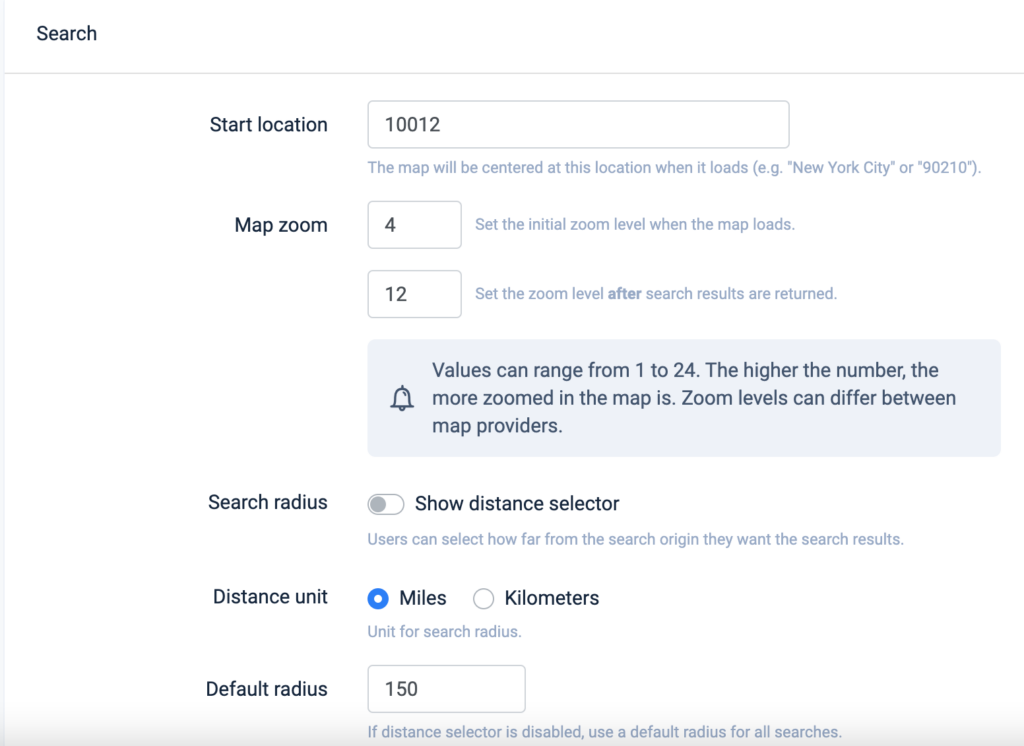
To make this customization, head to Settings > General and scroll down to the Search box. There, you’ll want to choose your Start Location (anything you would type into Google Maps, such as a city or zipcode) and your Map Zoom (this has a range of 1-24—the higher the number, the closer the picture will be zoomed).
Quick Tip: If you have stores all around the US or in multiple countries, your default radius needs to be a low number (aka a large default radius) in order to capture all the locations for your audience.
4. Filters
You can add up to three customized category filters to your map to help your customers find exactly which location they’re looking for. This is useful when your business has different types of locations (showrooms, drive-thrus, etc.), when you want to showcase where specific products might be, or when you have sub-brands that you want to differentiate.
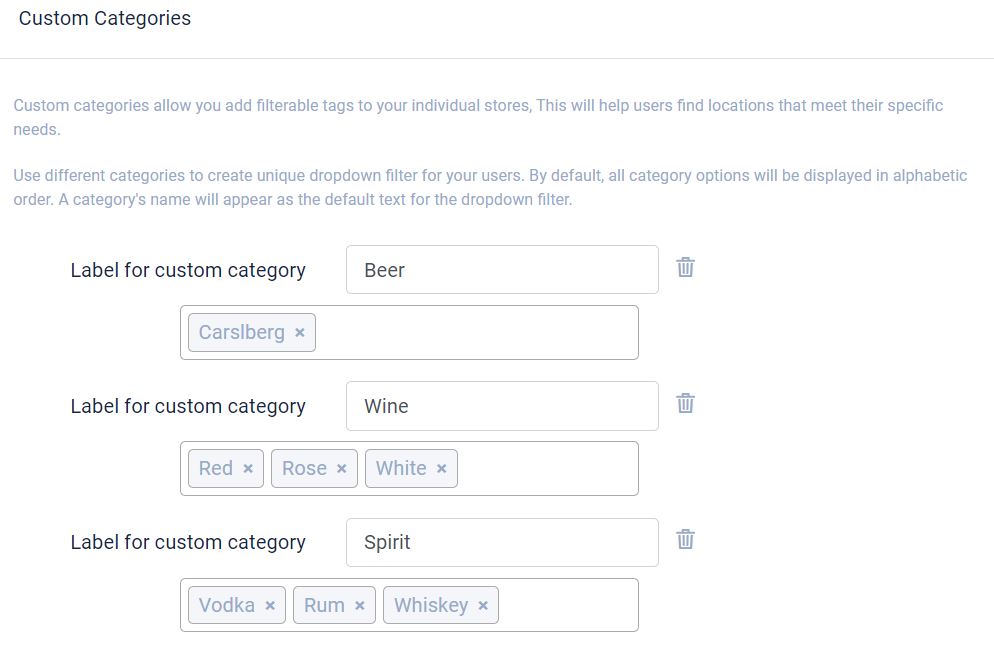
To get started with filters, navigate to Settings > Customize Text > Categories > Add Category. Once there, you can add your 3 custom categories and as many tags as you’d like. You can then assign them to stores manually or in bulk through CSV.
For the full instructions for adding custom filters, you can check out this helpful filter guide.
5. Custom Fields
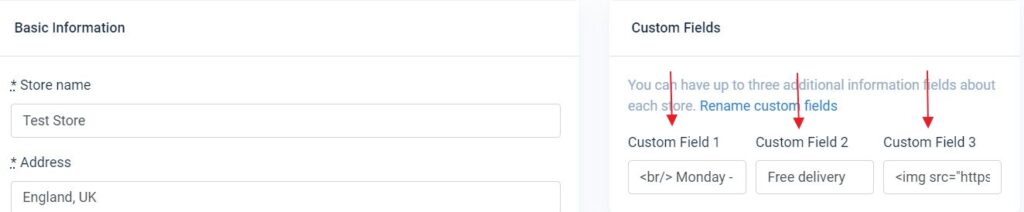
If you have additional information you want to display to your customers, Storemapper offers three custom fields to add whatever content you’d like, whether it’s text, HTML, images, or video. You can also add labels to these custom fields in the settings tab if you’d like to title your information.
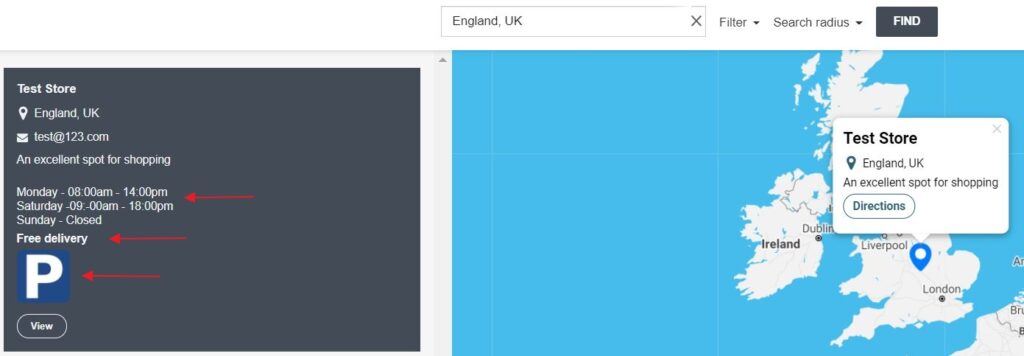
You can add these custom fields when you’re editing store information manually, via Bulk CSV Upload, or with Google Drive Sync. There, you’ll fill out custom fields 1,2, and 3 with your chosen information.
For the step-by-step instructions for adding custom fields to your locations, check out this tutorial on custom fields and labels.
6. Custom CSS
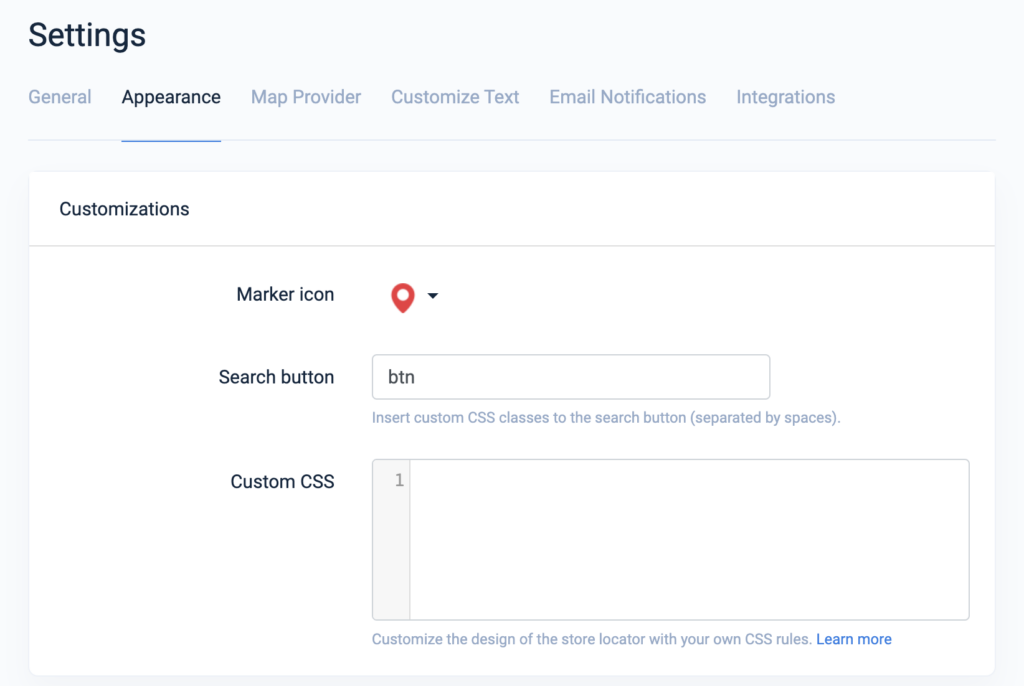
If you’d like to add custom CSS to your map, navigate to Settings > Appearance > Customizations, where you can add any custom HTML you’d like to implement. You can read the tutorial for adding Custom CSS on your Storemapper dashboard here. And if you need any help, our support team is happy to add any additional CSS you might need, such as extra buttons or other HTML features. Just reach out to us at help@storemapper.co if you need assistance.
Styling your map through Mapbox or Google Maps
If you’d like to customize the look of your map even further, you can make it even more unique by utilizing Mapbox Studio or Snazzy Maps.
For Mapbox users: Mapbox Studio
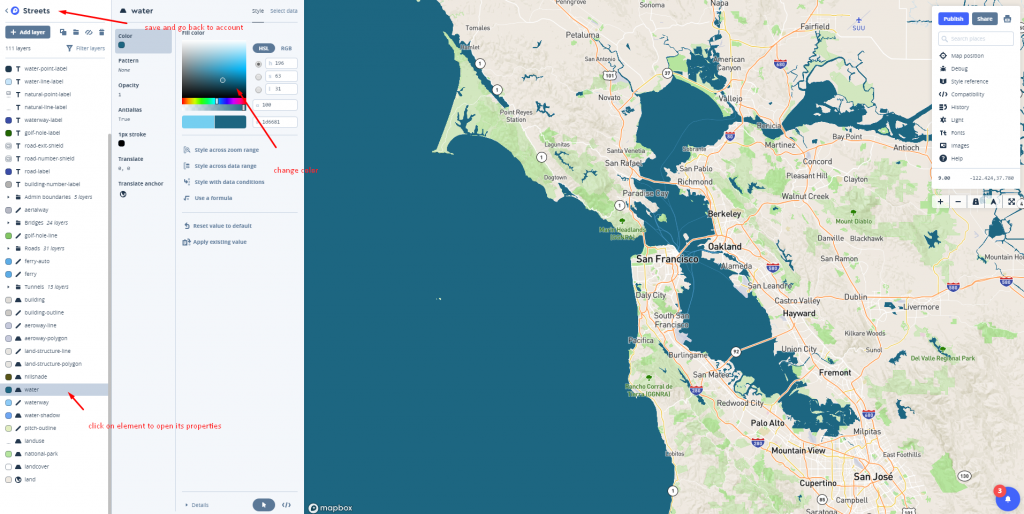
Mapbox Studio offers tons of cool features you can use to deck out your map, completely free! This includes ready-made color palettes, sky backgrounds that change colors based on the time of day, adjustable road widths, 3D buildings and terrain, and any additional points of interest.
Plus, you can either create a map to your exact specifications using their curated components, or you can edit one of their ready-made templates to your preferences.
For the complete instructions on adding a Mapbox Studio map to your Storemapper account, check out this how-to article.
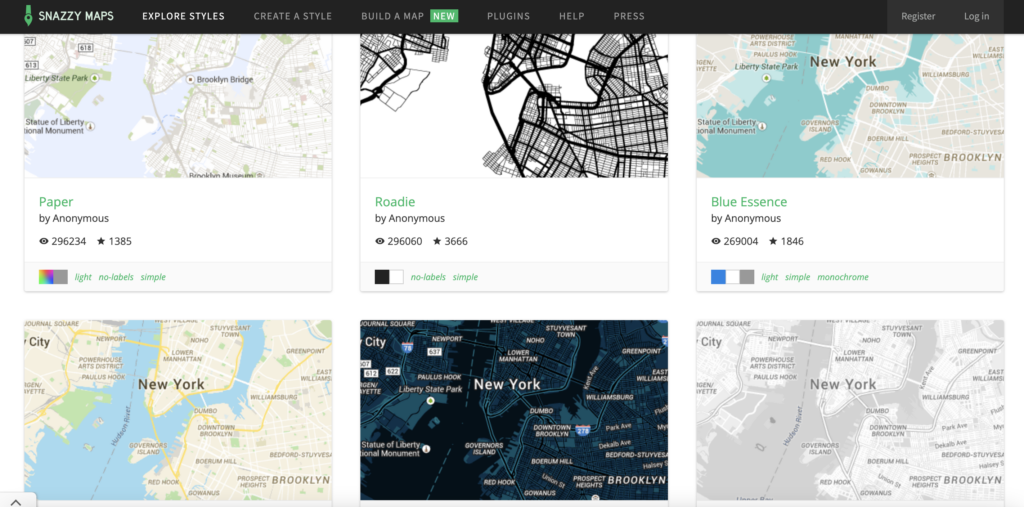
For Google Maps users: Snazzy Maps
Google Maps provides a wide assortment of map styles that can be utilized in Storemapper. And it’s easy to add your chosen style in Storemapper. Once you’ve picked a Snazzy Maps theme, navigate to your Storemapper Settings > Map Provider > Map Theme. There, you can follow the instructions and paste your “Javascript Style Array” in the code box. Or, if you’d like to get a little more hands-on, Snazzy Maps allows users to design a style themselves, so you can fashion your map exactly as you choose.
And if you’re having trouble deciding whether to choose Mapbox or Google Maps, you can check out this quick comparison of the two providers, with details on their Map data, features, cost, and customization offerings.
Conclusion
With Storemapper, it’s easy to match your website map to your branding. Plus, the Storemapper integration with Mapbox Studio and Snazzy Maps allows you to deck out your sitemap with numerous custom features. Whether you’re looking for a simple color and logo edit, or you’re ready for a fully customized map, Storemapper puts the design decisions in your hands.

